

 English
 Español
 عربى
Material Overview Wood plastic composite flooring, usually called WPC flooring, has become a practical choice for homeowners, contractors and commer...
READ MORE
Clean air, a human right
Many installers focus on speed, but the most expensive errors are the ones hidden under the surface: uneven joists, missing expansion gaps, and clips that do not seat properly. Correcting these after the fact usually means lifting boards, replacing damaged sections, and repeating labor that could have been avoided.
Throughout this article you will find practical checklists, a comparison table, and a process diagram that you can use as a reference during the project. The information applies to contractors managing commercial terraces and to homeowners building a backyard deck.
Preparation determines the quality of every later step. A substructure that is out of level or poorly drained will transfer its defects to the surface, and no amount of careful clip work can correct them afterward.
Joists must match the durability profile of the decking. Aluminum alloy joists and hot-dip galvanized steel joists both resist corrosion well and keep their dimensional stability under temperature changes. Timber joists are not recommended for this product because moisture movement can distort the substructure and loosen fixings over time.
The base must be flat, dry, and free of debris before any joist is fixed. Check the grade with a long straightedge and correct any low spots larger than a few millimeters. Good drainage is equally important, because standing water beneath the deck accelerates corrosion of metal supports and encourages biological growth on the underside.
Thermal movement is unavoidable. Co-extrusion decking expands in hot weather and contracts in cold weather. Without a planned gap at board ends and against fixed walls, the surface will arch in summer or open up in winter. Leave the allowance specified by the manufacturer and keep it consistent across the entire run.
A board that has room to move will stay flat. A board that is forced to stay still will eventually lift.
Assemble everything before starting. Interrupting a run to search for a missing clip or a correct blade wastes time and invites mistakes.
Circular saw with a fine-tooth blade suitable for plastic composites
Cordless drill and driver with a depth-limiting bit
Rubber mallet for seating boards without marking the surface
Spirit level and a three-meter straightedge
Tape measure, chalk line, and pencil
Safety glasses and dust mask
Co-extrusion profiles have groove geometries that differ from conventional composite boards. Clips designed for one profile may sit loosely in another, so always use the hardware system specified for your exact board. Mixing components is one of the fastest routes to rattling, lifting boards.
| Component | Purpose | Installation Note |
|---|---|---|
| Starter clip | Sets the first board line | Align with a chalk line before fixing |
| Hidden clip | Secures each board from the side | Snap into groove until fully seated |
| Stainless screw | Fixes clips to joists | Drive to a firm seat without crushing |
| End cap trim | Covers exposed edges | Seal cut ends before fitting |
The sequence below follows the order most professional crews use. Each stage depends on the accuracy of the one before it.
Figure 1: Installation sequence from substructure check to edge finishing
Snap a chalk line across the substructure at the position of the first board edge. Fix the starter clips along this line at the joist spacing specified for the project. Because every later board depends on this line, check its straightness twice before driving any screws.
Set the first board into the starter clips, leaving the required expansion gap against the wall. Confirm with a spirit level that the board sits flat across its width and length. Small corrections are easier now than after the rest of the boards are fixed.
Position each hidden clip in the board groove and drive its screw into the joist until the clip is firm but not crushed. Overtightening deforms the clip and can distort the board surface around it. Work progressively across the deck, checking alignment every few rows.
Slide the clip into the groove until it sits flush
Drive the screw to a firm seat, stopping before any visible deformation
Check the board line every three to four rows
Repeat across the full span before starting the next section
Where two boards meet end to end, the joint must fall directly over a double joist so that both boards have solid support. Leave the expansion gap at the joint and avoid placing two joints on the same joist line in adjacent rows, since this creates a weak pattern that concentrates stress.
Fit edge trim to conceal the board ends and the substructure. Seal any cut ends before installation, because exposed core material can absorb moisture if left unprotected. Trim should be fixed so that it does not restrict the movement of the deck boards.
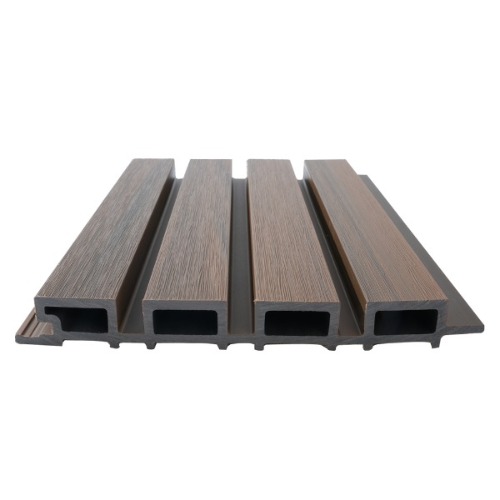
Keep a log of the expansion gap used at the start, middle, and end of each run. Discrepancies of even one millimeter across a long run can produce visible unevenness after a few seasons.
Most failures follow a small number of patterns. Recognizing them early saves considerable repair work.
Boards butted tightly together will buckle as temperatures rise. The surface may appear fine during installation and then lift during the first hot season.
Excessive spacing allows boards to flex under foot traffic. Over time this flex loosens clips and produces a springy, uneven surface that feels unstable.
Fixing through the visible surface breaks the protective co-extrusion layer. Once the cap layer is punctured, weathering begins at the cut point and spreads outward.
Using clips from a different profile creates loose fixings. Even a small mismatch in groove depth can allow a board to rock slightly under load.
Confirm substructure is flat within the tolerance specified for the project
Verify expansion gaps at every board end and wall junction
Check that joist spacing matches the expected load category
Use only the hardware system designed for the chosen profile
Inspect the finished surface for any cracked or damaged caps
Material cost is only one part of a deck project. Labor, downtime, and replacement are often larger expenses when installation is poor. A deck that is installed correctly can deliver a service life of around fifteen to twenty years with routine cleaning and occasional inspection. A deck with installation faults may need partial replacement within a few seasons, which costs far more than the time saved during installation.
Stable surface with no lifting
Minimal cleaning and no sealing
Predictable service life
Boards lift or loosen seasonally
Partial replacement and repeat labor
Shortened service life
Co-extrusion surfaces need little more than periodic washing with mild soap and water. Avoid abrasive pads and strong solvents, which can dull the surface finish. Inspect clips and trim once a year and tighten any fixings that have loosened.
Yes, but a substructure is still required. Concrete must be level, dry, and clean, and the decking should be supported on a raised frame that allows air to circulate beneath the boards. Direct contact with a damp surface can trap moisture and promote staining or fungal growth.
For high-traffic areas such as commercial terraces or public walkways, joist spacing of roughly 300 to 350 mm is commonly used. Closer spacing reduces flex under concentrated loads and helps maintain a firm, quiet surface over many years.
Many suppliers offer written installation manuals and video references for their systems. Reviewing these before starting, and confirming the expansion allowance and hardware type for your specific profile, is one of the most effective ways to avoid common errors.
A successful aluminum plastic co-extrusion deck depends on four things: a level and well-drained substructure, correct expansion allowances, matched hardware, and careful board fixing. When these elements are handled with discipline, the finished surface stays flat, quiet, and durable for many years. Contractors who build this discipline into every project gain fewer callbacks and stronger client trust, while homeowners enjoy a deck that performs as expected from the first season onward.
For the best results, plan the project in detail before ordering material, and confirm the hardware system and expansion specification with your supplier. Accurate planning at the start removes most of the risks described in this guide.

Material Overview Wood plastic composite flooring, usually called WPC flooring, has become a practical choice for homeowners, contractors and commer...
READ MOREInstallation Guide A deck can look flawless on the day it is finished and still fail within two seasons. In most cases the problem is not the board i...
READ MOREWhat Is Second Generation Co-extrusion Flooring? Second generation co-extrusion flooring is a composite outdoor decking system built with a dual-laye...
READ MOREWhy Outdoor Decking Fails Earlier Than Expected Many outdoor floors look fine on the day they are installed, then start to show problems within a fe...
READ MORE
 No. 6, Nanyuan South Road, Tangyang Town Industrial Park, Dongtai City, China
 [email protected]
 +86-17388015349
Copyright © Jiangsu Xuanhui New Material Technology Co., Ltd. All Rights Reserved.Custom Wood Plastic Composite Environmentally Friendly Materials Factory

